How do I create a Pledge-a-thon Category?
Organize your Pledge-a-thons into a category, if you have multiple Pledge-a-thons associated with the same campaign.
- Click Pledge-a-thon to view the Main Menu of this service.
- From the Setup section, choose Manage Categories.
- Click Add Category.
- Enter the Category Name, which appears at the top of the public pages.
- Choose the Language.
- This will automatically change the default text displayed to registrants & donors.
- Your Pledge-a-thon service must also be setup with a template for the selected language.
- Choose the Template Design.
- Your account has been automatically setup with a single template design for each language (such as version 1 = Athon.EN.v1.html)
- If your events are hosted on web pages with different designs, you have the option of setting up multiple template versions for one or more languages.
- Enter the Events in this category are known as a(n).
- This text will appear at the top of the listing for your Pledge-a-thons.
- For example: Event, Walk, Bike-a-thon, Location, School, Charity, Company, or Chapter.
- Choose whether to display the Pledge-a-thon Listing on the Category Welcome page or not.
- The Pledge-a-thon Listing will automatically display the links to each Pledge-a-thon Description page. The listing will also include the City and Start Date of each Pledge-a-thon.
- Suppress this section if you do no want to show the listing on this page. Instead, you can create your own links within the Description section shown at the top of the Category page.
- Click Update & Next to continue; or Save when finished to save your settings to the system.
On the Banner Image tab:
- Optionally, upload an image to be displayed as a banner at the top, across the entire width of the Category Welcome page.
- Alternatively, skip this section to include images within your Category Description instead. This allows you to position your logo across the top of your Description, moving the Category Thermometer up to the top of the page.
- To delete the image, click the green link Remove this image located below the image.
- Click Update & Next to continue; or Save when finished to save your settings to the system.
On the Description tab:
- Enter a Category Description in the text field which will be displayed on the Category Welcome page.
- You can use the HTML editor to add text attributes, paragraph formatting, images, links and colours to your description.
- Create a table to position an image beside a block of text.
- When pasting text from a Microsoft document, use the "Paste as Plain Text" icon and format your text with the HTML editor icons.
- Click Update & Next to continue; or Save when finished to save your settings to the system.

On the Thermometer tab:
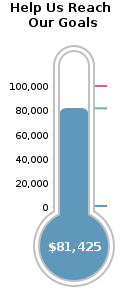
- Optionally, select to include a Category
Thermometer on the Category Welcome page.
- Enter the Title to be displayed at the top of the
thermometer, such as "Help us reach our goal".
- Enter the Goal to be used in the display of the
category thermometer.
- Optionally: For Add, enter an amount to be added
to the total amount displayed on this thermometer.
- Useful if you have received large corporate sponsorships by
cheque which are not to be attributed to any specific participant.
- For example: Type 5000
for a sponsorship of $5,000. This amount will be added to
the thermometer total. This amount will not be listed in your
GiftTool reports, it is simply a way for your category
thermometer to display your current online & offline
donations.
- Click Update & Next to continue; or
Save when finished to save your settings to the system.
On the Top Raisers tab:
- Optionally, select to display the Top Participants section on the Category Welcome page.
- Enter the List Size. The Top Participants listing will be limited to this maximum number of participants.
- Optionally, select to display the Top Teams section on the Category Welcome page.
- Enter the List Size. The Top Teams listing will be limited to this maximum number of teams.
- Click Update & Next to continue; or Save when finished to save your settings to the system.
On the Register Now tab:
- Enter the instructions in the text field which will be displayed on the Category Register Now page.
- You can use the HTML editor to add text attributes, paragraph formatting, images, links and colours to your description.
- Create a table to position an image beside a block of text.
- When pasting text from a Microsoft document, use the "Paste as Plain Text" icon and format your text with the HTML editor icons.
- Click Save when finished to save your settings to the system.
Once you have created a Pledge-a-thon Category, you must select the category in the setup of each Pledge-a-thon to be included in the category.
Was this information helpful?
|
|

